
How to Get Started with Fidu
Welcome to your new Fidu Account!
With this Onboarding Guide, you will have everything you need to bring your subscription and flat fee clients into your Fidu Account. Don’t have your Fidu Account yet? Click here to schedule your personalized demo and identify your next 3 actions to get started.
Of course, if you have any questions, just reach out to us in the app! We are here to support you.
Now, let’s jump in!
Step 1: Complete a Quick Tour of Fidu
Let’s quickly go over the platform’s layout and navigation to best prepare you to bring you clients into Fidu. Here, you will access all of Fidu’s robust features to help you customize and curate your client experience so you can scale the delivery of your subscription and flat fee services.
SECTION 1: THE DASHBOARD aka HOME
The Dashboard is an overview of the active work happening inside of Fidu. When you login, this is the first screen you will see.
Here, you will access quick views of: key metrics, open projects, upcoming project tasks for you (and your team), upcoming project tasks for your clients, recent messages, documents, and forms.
Take action by clicking one of the links, move to Section 2 to focus on delivering your services, or move to Section 3 to focus on designing (or refining) your overall client journey.
Reminder: In the beginning, this area will be blank. However, once you start adding clients and automating your work, you will see information populate in this area.
SECTION 2: THE “FRONT OF HOUSE”
This area of the navigation is where you focus on delivering your services. Here, your clients (and your team) can access all active projects and stay in communication. For your clients, they access your firm-branded portal with their curated resources and more. For your team, they access current work and communications to support delivering consistent and exceptional client services, at scale.
Here’s a quick overview of each section:
Clients is the centralized location where you can add, organize and manage all of your client’s information. In addition, you can further customize a particular client portal’s portal by navigating to their client record and adjusting setting, documents, forms, and more - only for that client.
Messages is the centralized location for all client communications. Ditch the email and bring all of your client messages into a secure, easily accessible, and organized experience.
Active Projects is where you manage and monitor the projects currently in progress. See key project metrics and current milestones so you, your team, and your clients remain on the same page without having to send status messages back and forth.
SECTION 3: THE “BACK OF HOUSE” aka “YOUR SECOND BRAIN”
This is where your knowledge and expertise comes together - - with the power of Fidu - - to help you design (and refine) your unique way of serving your clients and managing your client work. When you’re first building out Fidu, you will spend a good chunk of your time in the Back of House adding your client-ready resources, automating your work with projects, building your document automations, and leveraging Fidu AI - - and that’s just a few of our many features!
With Fidu, you can design your client journey from engagement through disengagement while automating 60-80% of your work so you can finally get back time (and space) to reimagine how you practice. Plus, as you continue to learn and iterate on your subscriptions and flat fee services, you will return here to update and refine your resources with improved processes, updated resources, and more.

Here’s a quick overview of each section:
The Productize menu allows you to turn your legal knowledge into reusable resources (and products) that can be easily shared with clients via a Service, Page, Project, or Workflow.
The Systematize menu allows you to bring together your Productize resources via a Service, Page or Project to automate the delivery of your services.
The Optimize menu is where you integrate Fidu with the other tools of your business' tech stack. Keep your legal team working in the tools that fit your workflows best, while providing your clients a centralized, curated portal where you to provide an excellent client experience.
Account Settings allows you to customize the look and feel of your portal, from branding, to terminology, and overall client navigation.
Support connects you with Team Fidu for all your needs - whether you have a question, want to request a feature, or would like to upgrade to our done-for-you services or subscription mastermind.
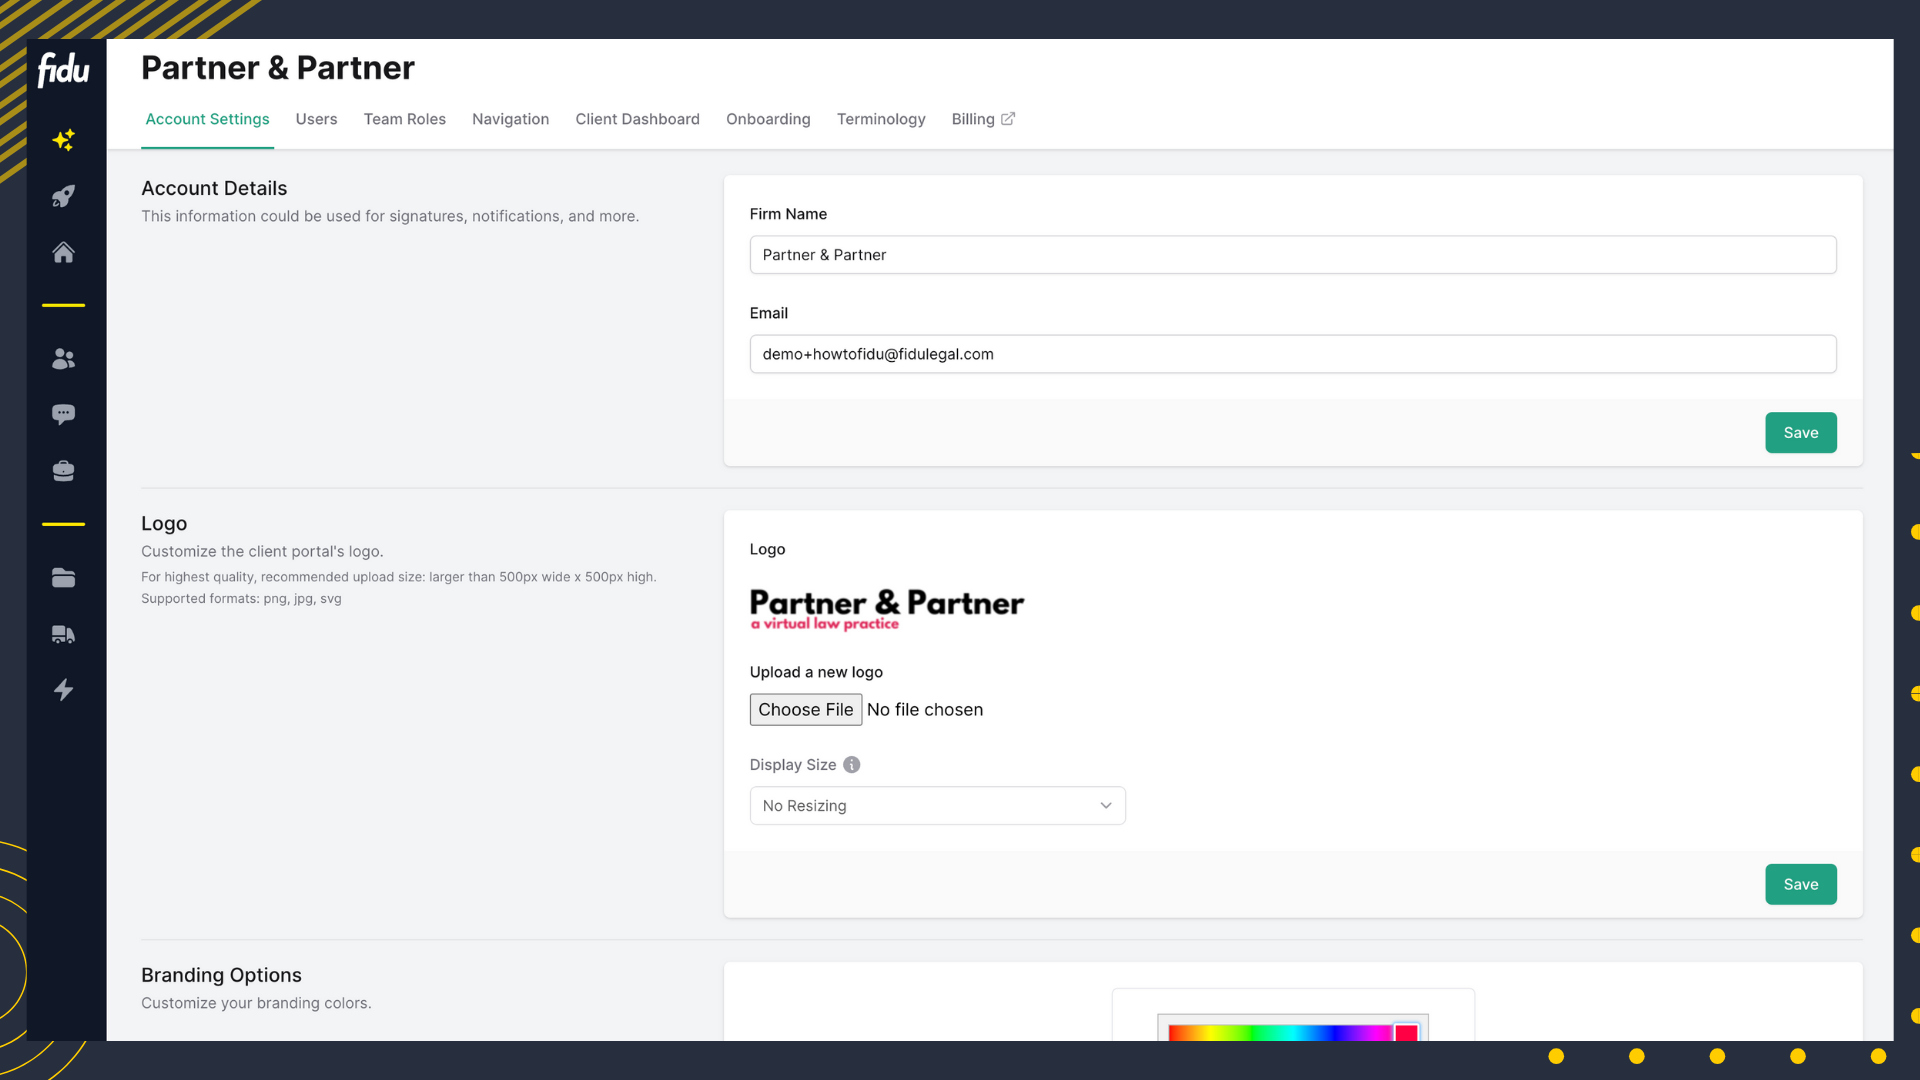
Step 2: Brand Your Experience
Now that you’re familiar with the navigation and layout, it’s time to customize your client portal so it matches your brand.
Follow these steps to Brand Your Experience:
Navigate to Account Settings from within your Fidu account.
Update the Firm name, as needed.
Upload your firm logo. Hit save. (for highest quality, the recommended upload size is larger than 500px wide x 500px high)
Customize your branding colors. These appear throughout your account as accents on buttons and notifications for the client. Hit save.
Upload a login photo. This will be shown on the login page for a professional and customized touch. Hit save. (for highest quality, the recommended upload size is 1920px x 1080px)
Click “Navigation” on the top menu to customize the Client Portal menu. Here you can enable and disable pages, in addition to adding custom pages.
Now - - your account is customized with your firm’s branding, allowing for cohesiveness across the platform!
Step 3: Create your Topics
Next, let’s create your topics. Topics keep your resources organized within the Productize library and, at times, are required in order to automate your services. Make sure you create at least one topic so all of your content and resources have a topic associated with them. And, as you build, you can add and reorganize your topics to fit your future needs.
Follow these steps to create your Topics:
Navigate to the Productize menu.
Select new and then Topic.
Customize the Name of the topic and synopsis, if desired.
Hit save.
Rinse and repeat for each topic you would like to create.
Step 4: Create your Engagement Letter in the Productize Library
One of the first resources you should bring into the platform is your Engagement Agreement. Using the “Document” resource type in the productize menu, you can quickly upload or paste a copy of your agreement within the platform so you can easily and efficiently incorporate the execution of the agreement, all within the platform.
Whether you have one agreement or you have several agreements designed for specific services, you can add each engagement agreement to Fidu as a document to streamline the engagement process and reduce the manual administration of a client hiring your firm to represent them.
Follow these steps to create your Engagement Agreement:
Navigate to the Productize menu.
Select New and then Document.
Decide if you want the Document to be “self-serve” or “approved” (you can change this later)
Select the Topic. Hit save.
Customize the Document Settings - Create the Internal and External name and description. Ensure that “Signable” is checked. Hit save.
Add a signature to the document by selecting "New Signature" and labeling it accordingly.
Navigate to the “Document” from the top menu to either upload the document as a .docx file or paste it from another source. Hit save.
Navigate to “Questionnaire” from the top menu to create a form to gather the necessary information for the engagement agreement. You will need First Name, Last Name and Email, at a minimum.
Use the following variables to ensure the questions populate the client/user records in the signup form/Engagement process:
client_name - If the client is an organization
user_first_name - The user record's first name.
user_last_name - The user record's last name.
user_email - The user record's email address.Navigate back to the “Document” from the top menu to map your client information in the appropriate places in the document by clicking the green plus sign. You can drop your cursor or highlight the text. Hit save.
Your document is now ready to be used AND connected to a Service to streamline the signature and payment process!
Step 5: Create your Service in the Systematize Menu
It’s time to package the service you are providing to your subscription and flat fee clients. Whether you’re offering a subscription or a flat fee service, our proprietary Subscription and Flat Fee Service Builder will help you pitch, price, package, and create a streamlined process to welcome your new (or current) clients into your curated Fidu Portal - - with the click of a button! From engagement through disengagement, your clients will experience a consistent and curated experience designed exactly how you want.
Follow these steps to create your Subscription or Flat Fee Service:
Navigate to the "Systematize" menu. Select “new” and then “Service”.
Select Subscription or Flat Fee.
Title your new Service. You can use a different name internally for your team, if desired.
Use the Pitch Builder to define the value of this Service to clients (beyond the package). This also ensures consistent communication across the team.
Set a price and hit save.
Navigate to “Package” and select the resources from your Productize Library you want to include.
Navigate to “Process” to set up the engagement and onboarding process.
Navigate to the Productize menu and select the resources to added or attach to the service. You can add a project to a service, but it’s not required. NOTE: if you have created resources already, they will show in the menu. If not, just select “New” and select the resource you want to create.
For each resource, complete the build out.
Rinse and repeat step 9 until all of the resources in your service are built and, when applicable, a topic is added.
Step 6: Add Your Engagement to Your Service
You’re at the home stretch. Begin the process of streamlining your client signing, payment, and onboarding process by adding your engagement to your Subscription.
Follow these steps to Add Your Engagement to your Subscription or Flat Fee Service:
Navigate to the "Systematize" menu and select the Service you want to use.
Select “Process” from the menu.
Toggle “Sign Up Form” on and select the Engagement Agreement you want to use.
Define the full name of the client by copying and pasting the user's first name and last name variables from your Engagement agreement.
Decide if you want to Require Approval. Requiring approval allows for a pause in the process to review signups, check for conflicts, etc.
Toggle “Engagement Letter” on - this will use the same Engagement Letter you connected in step 3.
Toggle “Payment” on if you want to collect payment with one of our integrated partners.
Toggle “Terms of Service” on if you want to require clients to accept your terms of service
Hit save.
Grab the sign up link from the “Sign Up Form” step - you can share this with your clients to allow them to onboard into your Fidu portal. NOTE: You can use your link within an email or linked directly on your site for a seamless onboarding process!!
OPTIONAL: Add a TEST CLIENT to your portal.
OPTIONAL: Run a test of the entire process.
OPTIONAL: Update/Refine any steps, if needed.
Add your sign-up link to your email or website.
Step 7: Welcome Your First Clients into Fidu!
And, that’s it! You are now ready to welcome clients into your Fidu portal! 🎉
We are excited to see how you leverage the power of Fidu and scale your practice with subscriptions and flat fee legal services!
Want to workshop your setup more?
Have more questions?
Get more support at our weekly office hours!
➡ Join here.
We are here to help. Reach out in app via the support button or join us for Office Hours (available for accounts with an active subscription).